What is a synthwave track without an epic snare reverb? In other words, a track’s snare drum reverb is the most coveted element of a soundtrack. For instance, it defines the genre and sends an audible cue to the listener which in turns cements the genre as an authentic synthwave soundtrack. This synthwave tutorial will address some creative techniques for applying reverb to a synthwave snare drum.
Question: How to the 80’s Snare Reverb Sound
Answer
One of the most widely asked questions is how to get the 80’s snare reverb sound. By this, most aspiring synthwave producers are talking about the drums heard on Phil Collins legendary drum fill “In the Air Tonight”. Similarly, synthwave producers such as TimeCop1983 boasts some impressive synthwave drum sounds that are awe-inspiring and clearly set the stage for the all-embracing synthwave drum sound. The key to nailing a great synthwave snare sound lies primarily with the drum sample itself. If you decide to use an inappropriate snare drum sample for your synthwave track, then no amount of reverb will give you that authentic sound.
Best Synthwave Snare Reverbs
If you’ve ever wondered how to apply reverb to a synthwave snare then keep reading. Applying reverb is easy however we’ll discuss a few advanced techniques. But first, let’s outline some popular reverb units that pair very well with synthwave snare drum samples.
Lexicon 480L Digital Reverb and Effects
Released in 1980s, the Lexicon 480L Digital Effects System is iconic and was featured in many hits of the 1980s. The hardware and plugin version provide spacious reverb environments and its controls allow for endless configuration of said spaces. If you love to tweak knobs incessantly, then this plugin is right for you.

AMS RMX16 Plug-In for UAD-2
The AMS RMX16 reverb was used extensively in the 1980’s and is heard on many recordings including U2, Peter Gabriel and Radiohead. It is known for being musical and fairly easy to use.

Valhalla Plate Reverb
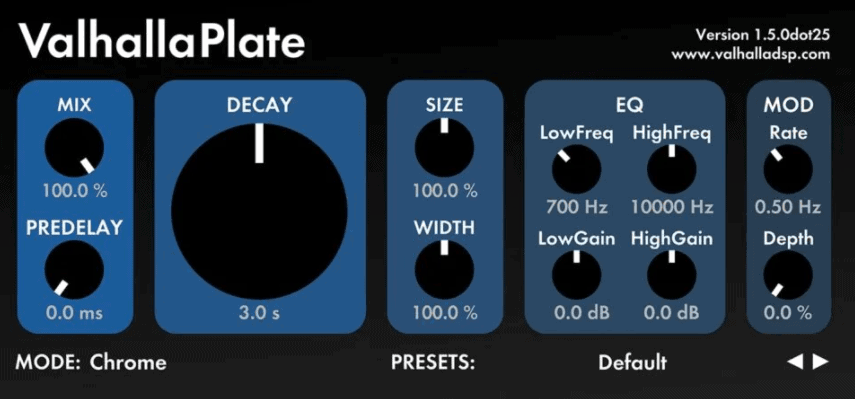
Although this reverb isn’t from the 1980’s it does have some features that are easily applicable to synthwave music. Valhalla’s plate reverb is simple as the controls are fairly obvious. It does however have a metallic sound but this is easily rectified with EQ and saturation. Finally, it’s worth mentioning that Valhalla does offer other notable reverb plugin units such as VintageVerb, Room, and Shimmer – all of which are reasonably priced and highly effective.

When To Apply Long Reverb Tails to Snare Drums?
It’s easy to apply too much reverb to a snare drum sample that subsequently drowns out other instruments. As an alternative, set up a return channel and send a portion of the signal to the return channel which contains a reverb plugin. In most cases, a small amount of reverb goes a long way. There are times however, when longer reverb tail is desired. For instance, long tail reverbs help convey the vastness of a space – in particular synth pads and lead lines. For drums however, shorter decay times are preferred unless a soundtrack is sparse and the reverb does not conflict with accompanying instruments.
How Much Reverb Should You Apply to a Signal?
The role of any reverb unit is to place a signal within the confines of a given space. While this is true, adding more reverb to a signal will place the instrument farther back in the mix. This gives the opportunity for other instruments to cut through the mix and sound much closer to us in the context of a room/space. When setting reverb amounts, some audio engineers will pull back on the send amount once the reverb is slightly noticeable. In this context a subtle amount is appropriate but this practice may not be enough for your typical synthwave banger.

How to Get the 80’s Snare/Reverb?
One of the most widely asked questions is how to get the 80’s snare reverb sound. By this, most aspiring synthwave producers are talking about the drums heard on Phil Collins legendary drum fill “In the Air Tonight”. Similarly, synthwave producers such as TimeCop1983 boasts some impressive synthwave drum sounds that are awe-inspiring and clearly set the stage for the all-embracing synthwave drum sound. The key to nailing a great synthwave snare sound lies primarily with the drum sample itself. If you decide to use an inappropriate snare drum sample for your synthwave track, then no amount of reverb will give you that authentic sound.
As a starting point, look to using samples from classic drum machine units like the Linn Drum or Roland 707 drum machine. These snare hits are heard in many synthwave tracks. In fact, you can always layer this snare hits to add variety to an already overused drum sound. The sky’s the limit so be creative and layer them with other percussion hits.
Once you’ve crafted a great sounding snare drum, adjust the eq, add compression and run it through your favorite reverb unit.
- Parallel compression for synthwave drums
- Kick drum layering techniques
- How to make synthwave melodies in Ableton tutorial
- Learn more on Synth bass mixing
- Learn how to use foreshadowing on a synthwave track
- Learn how to create a whisper track
- Learn how to add VHS tape noise to a Synthwave track to make is sound totally retro
- Learn how to create better transitions in your arrangement
- Program synthesizers like a pro with this cool app
- Download the Free Synthwave Drum Selector
- Enroll in the synthwave masterclass
Best Settings for Reverb Decay Times?
There is not hard and fast rules for setting reverb decay times. Reverb times are dependent on the tempo of our song and how often our instrument is being driven through the reverb unit. For instance, the occasional snare hit in a sparse composition can make use of longer reverb tails to fill up the mix. Conversely, if a song is rather busy and features a faster tempo, perhaps a shorter decay is warranted. Doing so will clean up our mix and allow other instruments to cut through the mix.
How Long Should You Set Your Reverb Decay Time?
What is the ideal duration of a reverb’s decay time? This a question that many aspiring synthwave producers are wondering. As a general rule, as it relates to snare drum samples, reverb decay times should trail off the moment the next snare drum sample is heard. In other words, having your reverb decay times set too long (2000 milliseconds) to the point where the subsequent hits are buried in reverb will only clutter up a mix. Instead, reduce the decay time so that each snare hit’s reverb tail begins to subside by the time the next hit becomes audible. (400 ms)
Snare Drum Reverb Decay Time Automation
There are times however when longer reverb decay times provide another layer of complexity. For instance, when a longer reverb tail is set to (1.5 – 2 seconds) it is imperative to monitor how that affects our overall mix. Remember, longer reverb tails will interfere will the clarity of our mix.
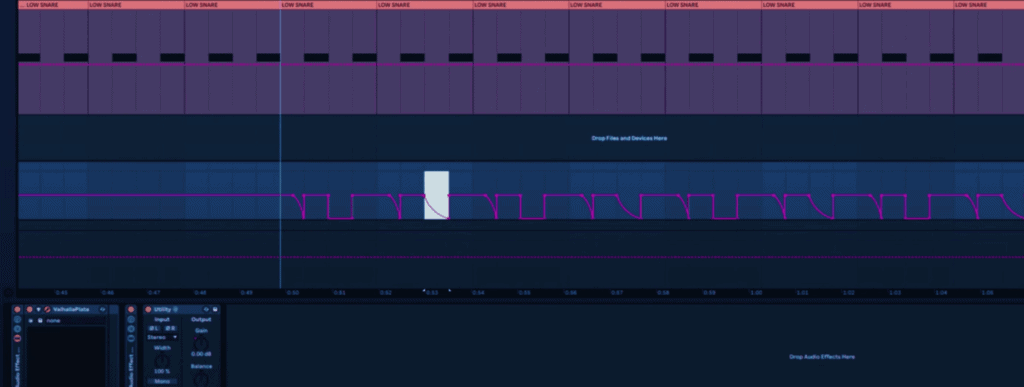
To alleviate this problem, automation can quickly turn things around for the better. For instance, on the reverb return channel, place Ableton’s utility plugin at the end of the reverb effects racks. Next, automate the utility’s gain control so that the tail is gradually reduced by the time the next hit strikes.

This technique not only gives you control over each reverb hit, you can automate different volume envelopes which in turn offers another underlying groove to a drum pattern. Watch video snare drum reverb tutorial on how this is done.
Conclusion
While traditional reverb applications are still what most producers rely on, it is always a good idea to spice things up even more with automation. In the end, the implementation of new music production techniques opens up a world of sonic possibilities so don’t be shy and continue experiment.
Recent Posts
Finding time to produce music while managing a job can be challenging, but several strategies can help you balance both effectively. Prioritize Music Production Make music a priority in your...
We often imagine making music as an effortless flow of creativity—strumming guitars in sunlit rooms or producing beats late into the night with pure passion. But for many musicians, there’s a...

