
The synth bass instrument is integral to the synthwave sound. Without a compelling synth bass, a synthwave song lacks the character, attitude and style that typifies the synthwave genre. By and large, synthwave artists rely on bass sounds that are deep, rich and powerful. Many would argue that the Korg, Polysix is the gold standard for laying down a solid bass line while others would prefer synthesizing something equally as noteworthy through careful sound design. In this tutorial, we’ll learn how to make a synthwave bass preset in Xfer Serum.
How to make a synthwave bass preset
- Select a waveform for oscillator A
- Duplicate the first oscillator and pitch oscillator B an octave higher
- Use the pitch module cents to Inversely detune both oscillators by equal amounts
- Enable the filter module and choose a low pass filter
- Route both oscillators to the filter
- Assign an LFO to the filter’s cutoff and adjust the envelope amount
- Adjust the LFO’s rate to 16th notes
- Set the synthesizer polyphony to mono
- Enable the sub module and choose a square wave. Mix to taste after pitching it down 1 octave
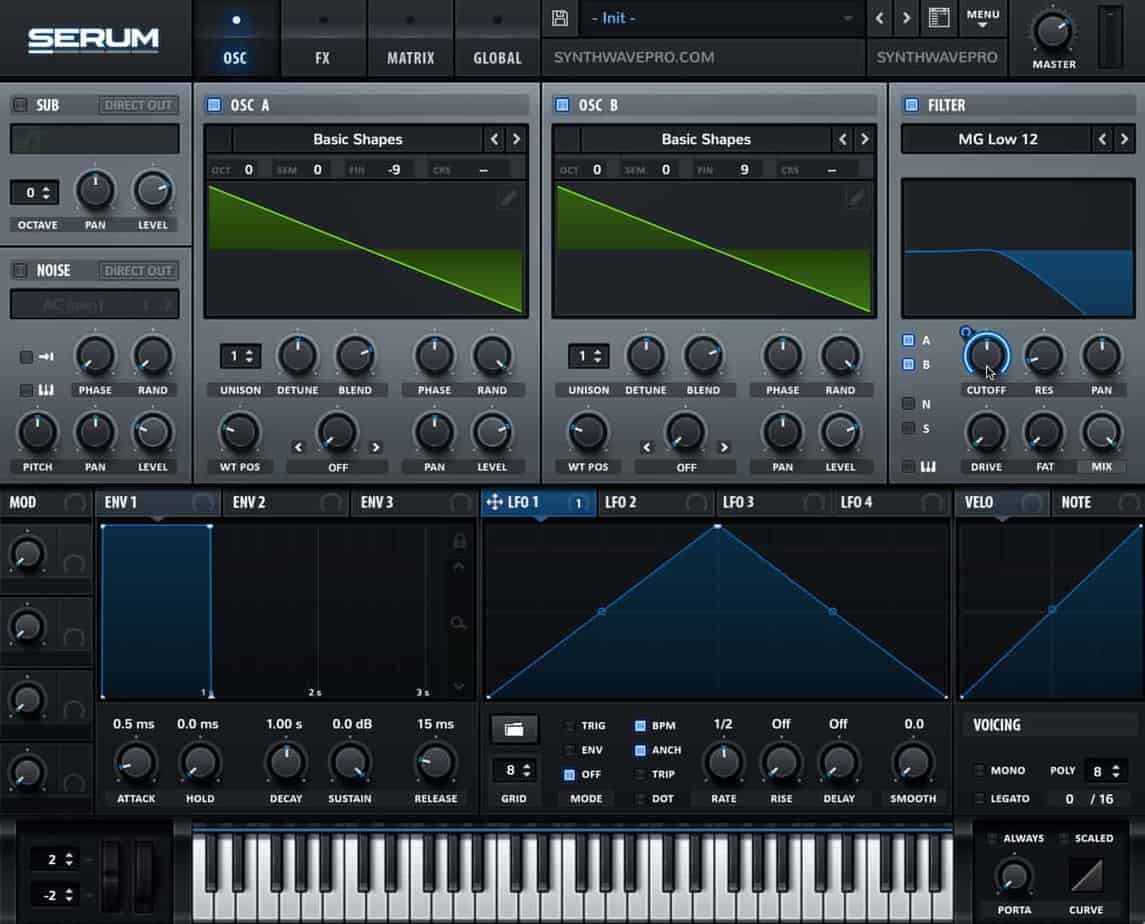
Select a Waveform
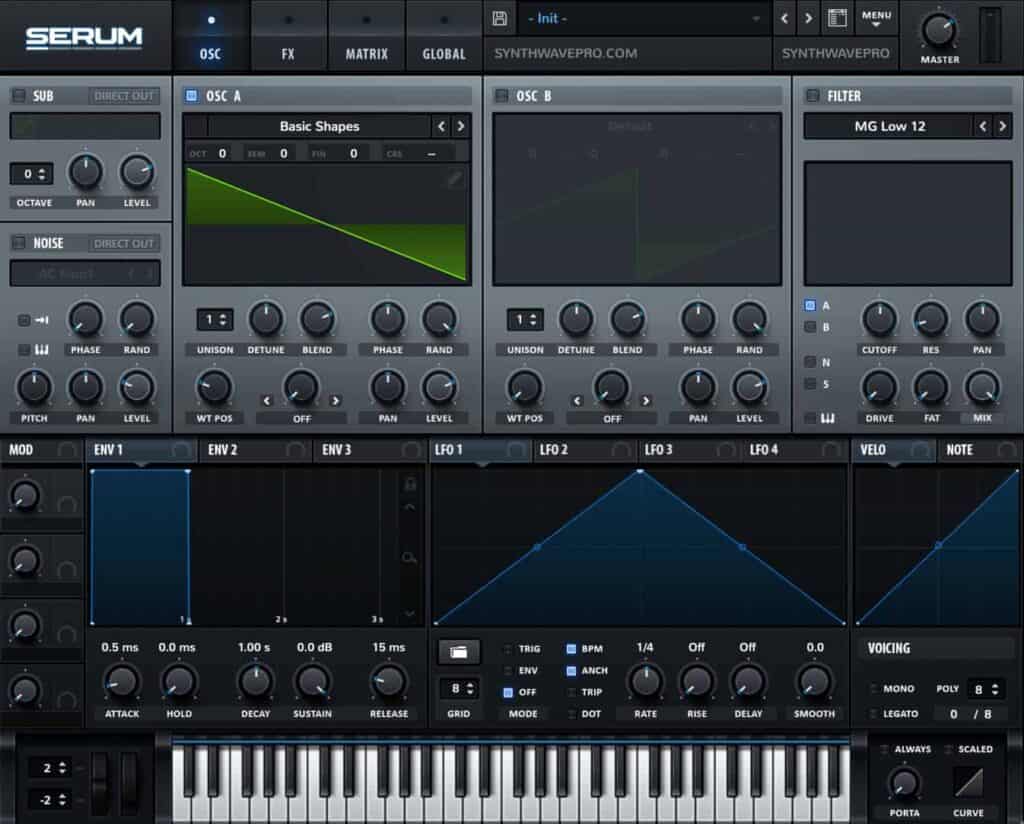
Load an instance of Xfer Serum and load an sawtooth waveform. By default, Serum’s default preset – at launch – is a sawtooth. Follow these easy steps in case Serum loads an alternate waveform than the sawtooth:
- Navigate to the waveform menu
- Select basic shapes
- Once loaded, scroll through Osc A’s wavetable by turning the wavetable knob.
- Select the sawtooth waveform
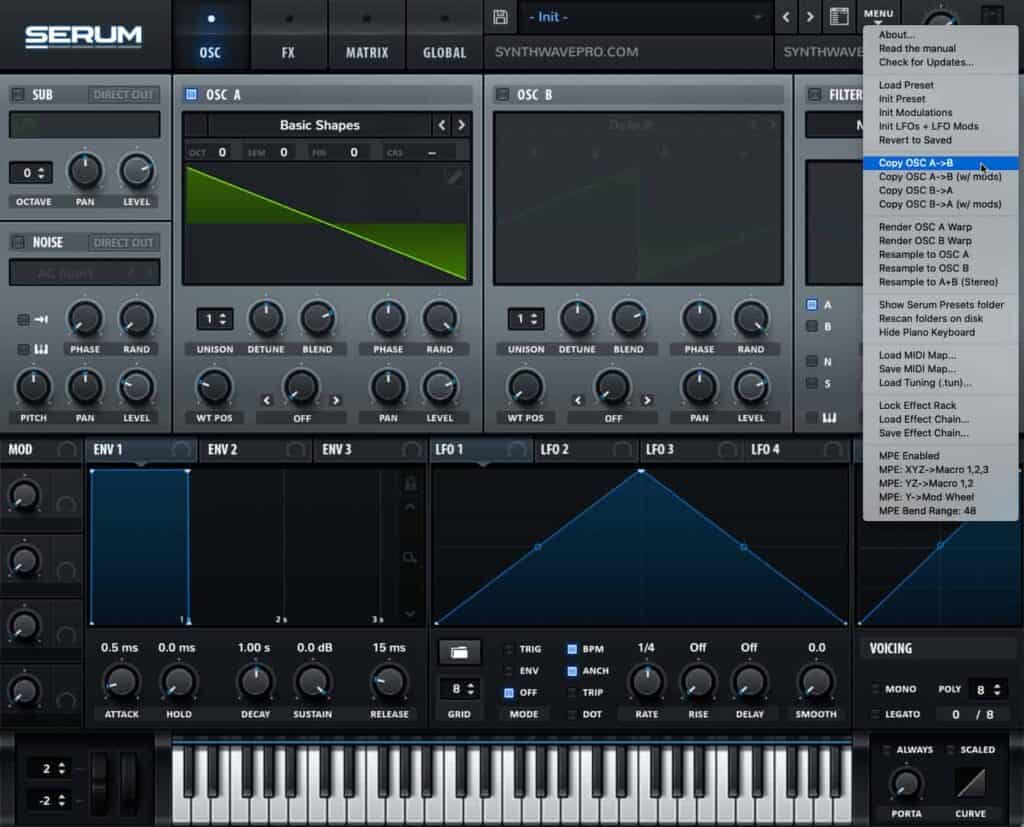
Doubling
In this step, we’ll add height to our sound by doubling our oscillator. Doubling is a sound design technique designed to increase the frequency content of our sound. In this example, we’ll use it to duplicate and slightly detune our sawtooth waveforms making the overall sound “thicker”.
Follow these east steps to double your sound:
- In the context menu, navigate to “copy osc A to osc B”
Detune the Oscillators
Doubling serves a critical role in smearing our sound. Smearing is a sound design technique designed to give dimension to our sound. Smearing is achieved by detuning both oscillator A & B by equally small amounts. The result creates a pulsating effect. The rate and depth of the pulsations are affected by the amount of detuning between both oscillators. By and large, the wider the detune gap between both oscillators, the more audible the pulsations become.
Follow these easy steps to detune both oscillator A and B
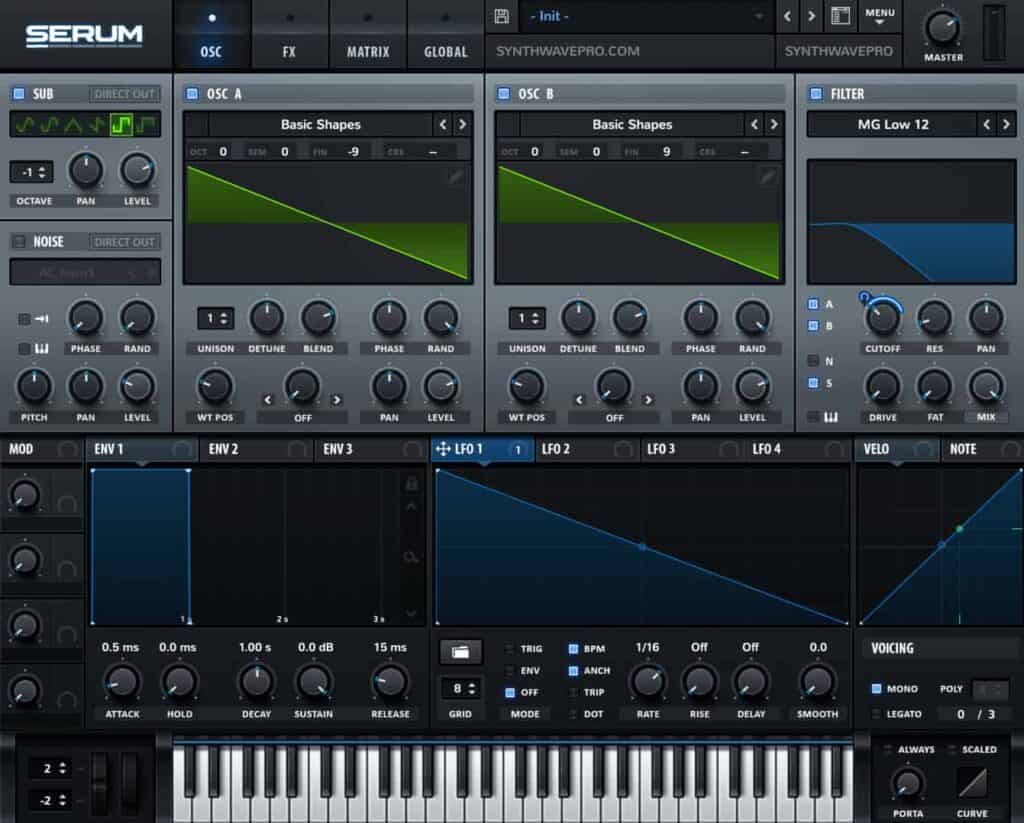
- Increase oscillator A’s fine amount by +9 cents
- Decrease oscillator B’s fine amount by – 9 cents
Cents are the unit of measurement found in each note. There are 100 cents in a note. Cents are tiny pitch subdivisions that make up a single note.

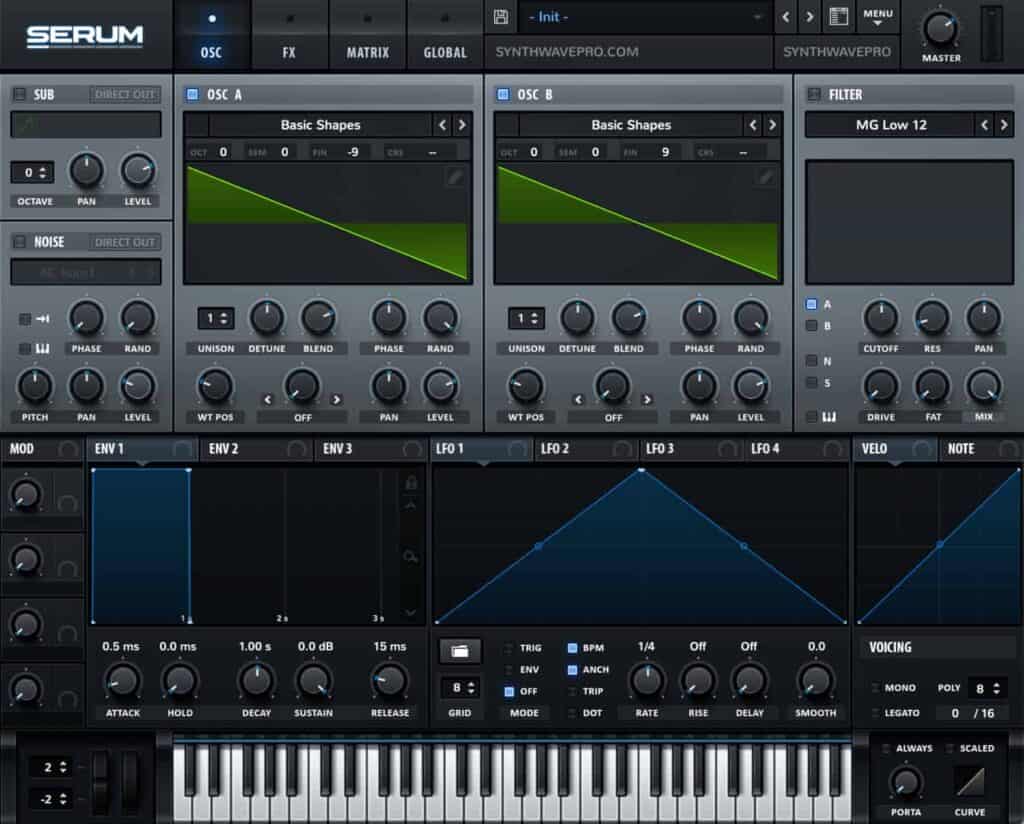
As a general rule, apply the same amount of inverse cent detuning to bother oscillators. For instance, if you detune oscillator A by +18 cents, be sure to apple the relative detune of oscillator B to – 18 cents.
The effects of doubling and detuning oscillators is close to what some would call a chorus effect.
Unlike a chorus, the signal remain mono and stereo no stereo information. This a good sound design technique if you wish to keep your bass preset mono compatible, yet have it impart a somewhat “pseudo stereo” feel.

Select a Filter
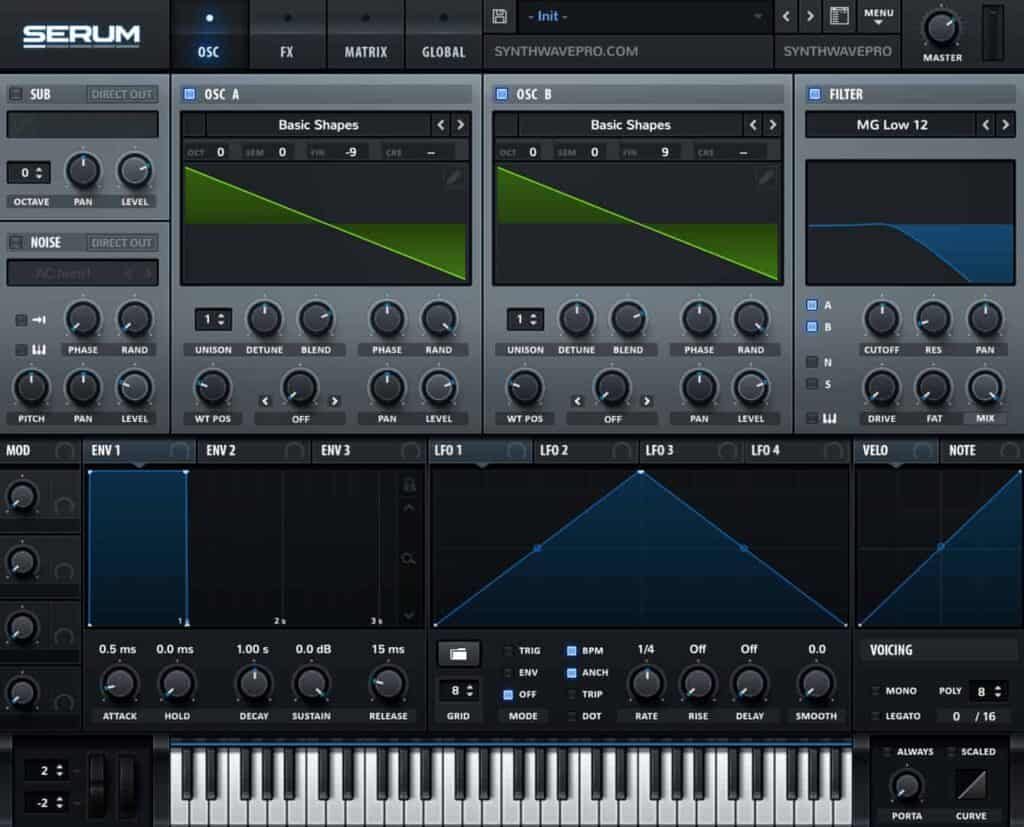
Enable Serum’s filter module and select the MG low 12 filter. This filter type if a low pass filter with a 12 dB slope. The sharper the filter slope the more dramatic the cutoff resulting in a much dark sound as hardly any frequencies make it beyond the cutoff point.
Next, route Osc A and Osc B to the filter by enabling the A and B buttons located on the filter’s module.
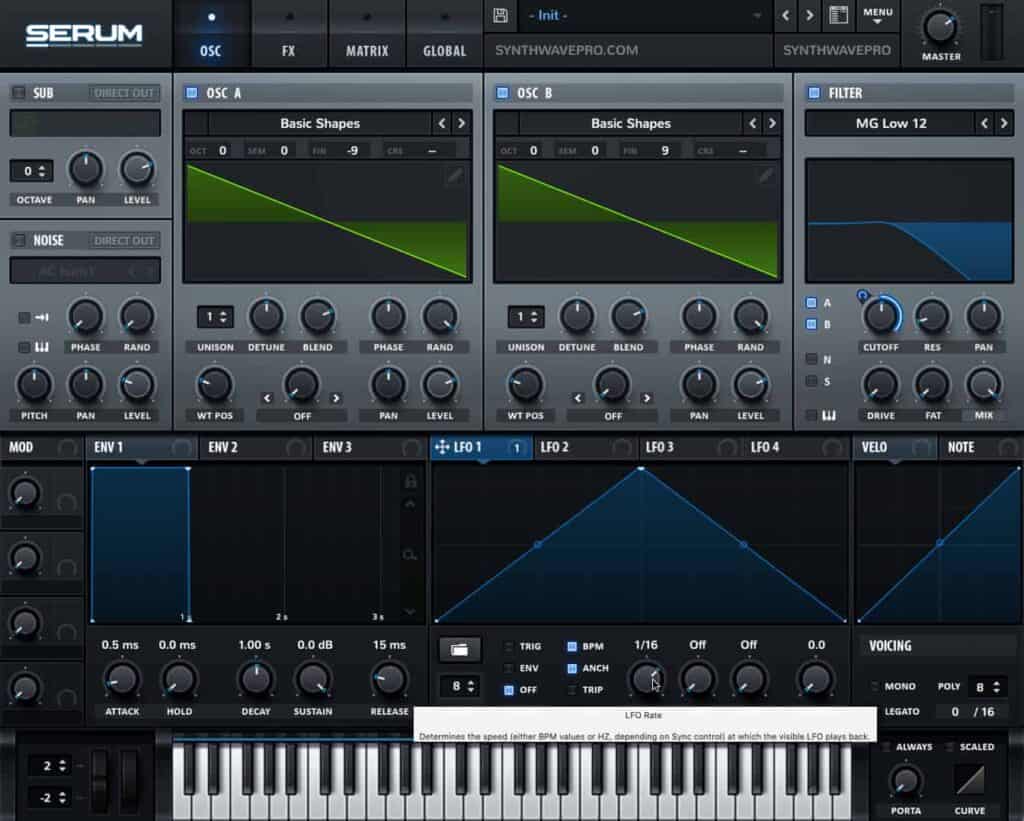
Add an LFO

Let’s turn our attention to LFO 1. LFO stands for low frequency oscillator. Unlike oscillator A or B, an LFO is uniquely tasked with controlling the movement of our synthesizers parameter. In other words, the LFO emits no sound. It merely controls the movement of other parameters that we’ve programmed it to affect. In this example, the LFO will affect the filter’s cutoff.
Follow these easy steps to assign the LFO to our filter’s cutoff:
- Grab LFO 1 crosshair shaped icon and assign it the the filter’s cutoff.
- Ensure the dial is pointing to to roughly 8 o’clock
- Increase the envelope amount (env amt) to 1 o’clock
- Be sure to set LFO’s movement to unidirectional. Select + hold command and options to toggle from uni-directional to bi-directional. Alternatively, these changes can be done on the synth’s Matrix pane.
- Adjust the LFO’s rate to 16th notes
- Adjust the shape of the LFO so it ramps down immediately


Set the Polyphony
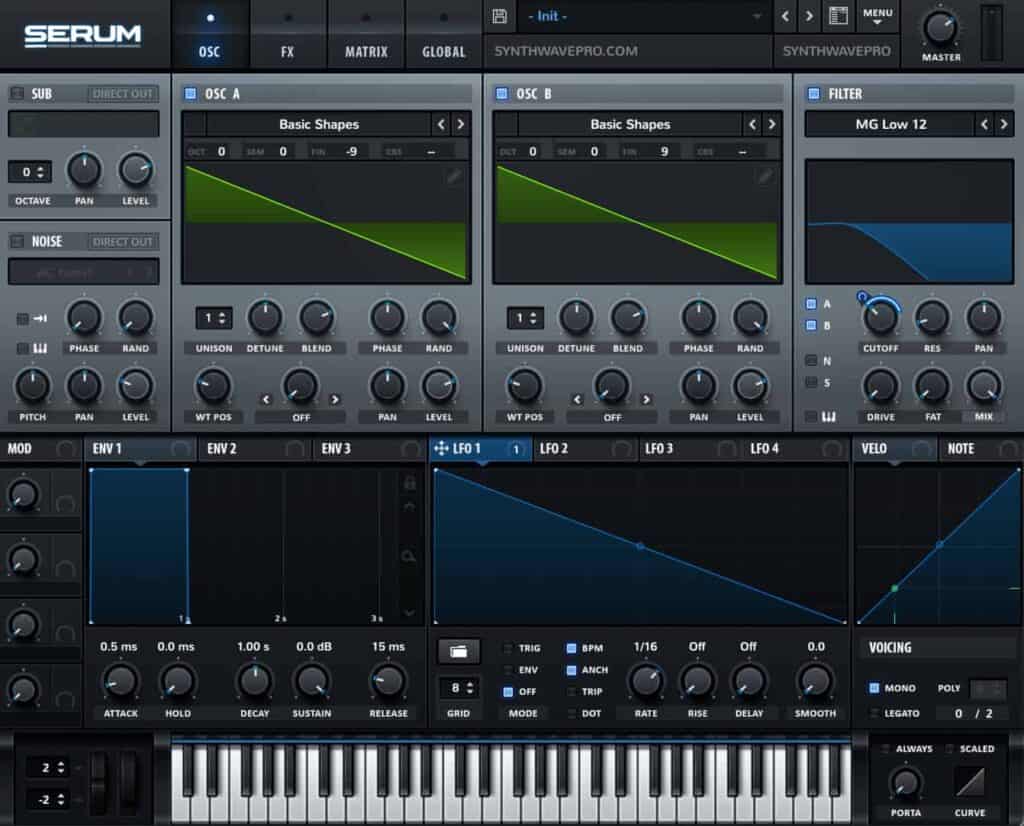
Toggle on monophonic
Set the voicing to mono therefore forcing the synth to play one note at a time instead of multiple notes.
Engage the Sub (Optional)
Use square wave to add aggression and power to the sound. To do this, enable the sub and choose a square waveform. Next, lower the sub’s pitch to -1 thus lowering it an entire octave. This step is optional as the current patch may contain sufficient low-end for a track.
Recent Posts
How to Start Producing Synthwave: The Beginner’s Guide You Actually Need
Synthwave might sound like neon lights turned into music — nostalgic, dreamy, powerful, retro, and modern all at once. But if you’re just getting started, it can feel overwhelming: “What synth...
Finding Inspiration in Writing Synthwave Music: Tapping into the Neon Muse
Synthwave is more than just a genre—it’s a vibe, a feeling, and a cinematic journey. With its roots buried deep in 1980s nostalgia, VHS textures, retrofuturistic fantasies, and analog warmth,...