
A wide bass sound can really warm up a synthwave track. While most producers shy away from uber-wide bass presets, a little width does go a long way. In this synthwave tutorial, let’s explore four tips on how to widen a programmed bass preset in Serum.
How to Create a Sub Bass
The sub bass, perhaps the lowest frequency signal in your song, is the foundation of your track. The sub, as it’s commonly known as, shares its frequency range with the kick drum and low-tuned toms. The secret to laying down a powerful sub is to use an appropriate wave form.
Typically, the sine and square waveforms provide the basis for sub frequency presets. Unlike the buzzier sawtooth waveform, the harmonic content of the two waveforms are rich with low-end information while keeping the amount of higher frequency content to a minimum. In the context of a mix, both sine and square waveforms provide the low end support while pads and leads seemingly fill up the higher frequency spectrum. Finally, a pulse width modulation square wave set to a balanced 50% duty cycle offer rich sub frequencies compared to their 25% and 75% versions.
Question: How to create a wide bass?
Answer: Use a variety of stereo widening plugins. For instance, chorus, delays and filter delays are ideal for creating wider basses. Alternatively, you can layer your basses to include the mono sub and wider mid-range bass.
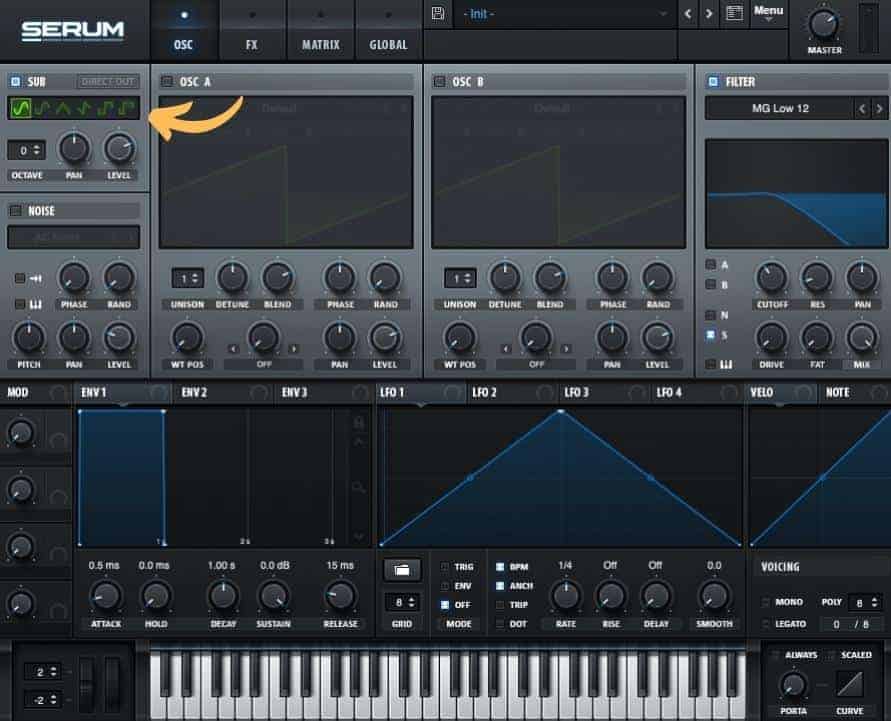
Follow these easy steps to create an earth-shattering bass preset in Serum.
- Load an instance of Serum
- Instantiate the sub module
- Choose a sine, square wave or any variation of those waveforms
Alternative for creating a bass preset
- Load up an instance of Serum
- Instantiate Oscillator A
- Click on the wave table menu (default) and navigate to basic shapes
- Toggle the WT POS (wavetable position) know until it’s set to sine or square wave
- Turn Osciallator’s A rand (random) knob to 7 o’clock position – hard left
When the rand knob is set to the 7 o’clock position, the wave cycle will begin to oscillate from the same starting point ensuring for a more consistent bass sound.

How to Create Mid-Range Bass
The mid range-bass layer, typically set an octave higher than the sub, is the audible component of the bass complex. This is generally the bass layer that is heard on playback systems such as laptops and other devices also known to have smaller speaker sizes.
Here is how to create a mid range bass in Serum
- Create a MIDI track and load an instance of Serum
- Use Oscillator A and B and select any waveform you desire
- Turn the phase knob to determine where you want the wave cycle to commence
- Be sure to set the rand knob to 7 o’clock for a consistent bass sound
How to Combine the Bass and Mid Range Bass
Now that we’ve created our sub and mid-range basses, it’s time to pair them together. The trick to combining the sub and mid range bass lies in creating a space in which each sound can comfortably reside. For instance, use a low pass filter to roll off the high frequency range of the sub bass frequency.
Next be sure to use high pass filter to reduce the low end of the mid range bass layer. Doing so ensures that both bass patches have room to breathe and may reduce excess bass buildup.
Here is a tutorial that reveals 10 tips for creating a better synth bass.

How to Widen Your Mid Range Bass With Chorus
Chorus bass, a staple which harkens back to the 1980’s, is often ignored as modern producers prefer a mono bass. In the synthwave music genre however, a slight chorusing of the bass can add dimension to a flat sound.
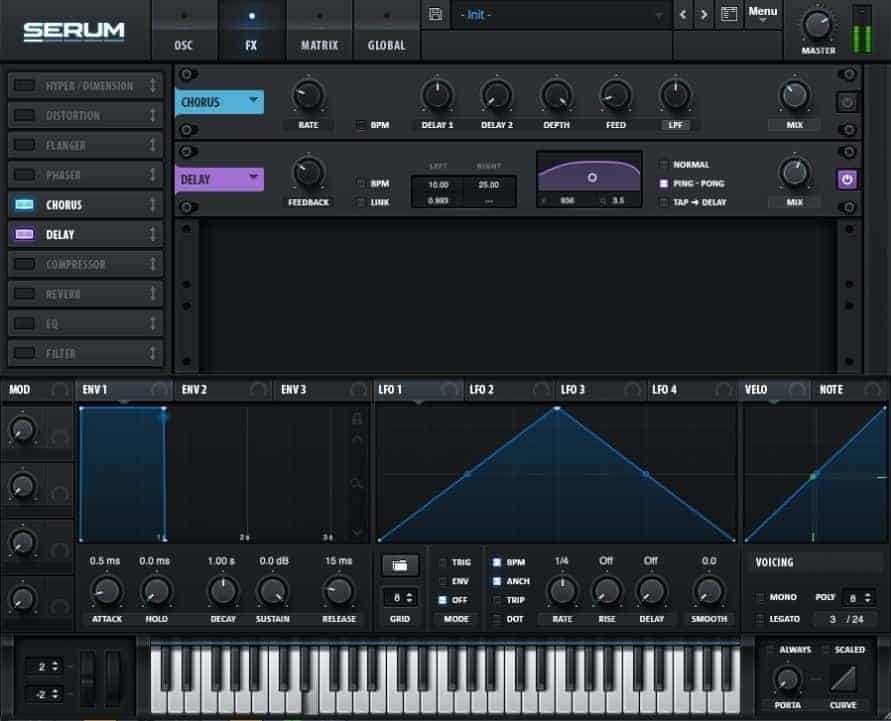
In Serum, turn to the FX pane of the mid range bass preset and load up the chorus module. Crank up the dry/wet knob to taste to automatically widen your bass sound. Don’t overdo it however, as you may encounter phase issues.
Things to consider when using the chorus widening technique
- Choruses will smear, pulsate and widen your sound
- The Dry/Wet knob controls the amount of chorusing
- When set to higher values you will get more pulsations
- The rate determines the speed of your pulsating effect
- Use the Bpm button to sync chorus pulsation to the rhythm of your song
- The faster the speed the more out-of-tune it will be
- Use the rate knob to scale back on the back side-effects of a faster rate
Bonus Serum chorus tips
- The depth knob affects the pitchiness of the chorus (too little and the chorus doesn’t do much)
- Too much depth and the chorus sounds out-of-tune
- Feedback affects the resonance of the chorus
How to Widen Your Mid Range Bass With Delays
Delays are a great way to add depth and width to most sounds. The trick to widening the bass lies in the time delay between the left and right channel. Here’s a quick step by step guide to widening your bass using Serum’s delay module.
- Click on Serum’s FX pane
- Instantiate Serum’s delay module
- Set the modules timing parameter to ms by unchecking the BPM box
- Next, set the left and right channel timings to 10ms and 25ms respectively
- Use the delay’s built-in module to band pass the delayed copies

How to Widen Your Bass With an LFO
LFO, or low frequency oscillators are useful for creating movement of a given sound. As an example, we’ll turn to our mid-range bass and widen it’s overall stereo image by setting an LFO to oscillator B’s, pan pot. Here’s how this is done.
- With the mid range preset engaged, tether LFO 1 to oscillator B’s pan pot
- Ensure the LFO’s tracking is set to bidirectional configuration
- Adjust the LFO’s rate to taste
- Adjust the LFO’s amount. It does not have to be set to 100. Even conservative values are effective.
Conclusion
Of course these bass widening techniques should be taken with a grain of salt. In fact, there are more bass widening techniques that are perfectly suited to create wider basses. The trick with finding the right bass widening balance is to apply conservative values with the dry/wet knob.
Remember that the bass is meant to compliment and ground the overall sound of your track. Once the pads, synth and melodic elements begin to take shape, reconsider adjusting the width of your bass using Ableton’s utility plugin’s width control. In fact, if you find that your mid range bass is still too wide, then activate the utilities bass mono button to reduce the width of the selected frequency cutoff.
Recent Posts
I’ve been producing synthwave for a long time now—and there’s one thing I see over and over again: Tracks that have good ideas… but still sound cheap. Not because the producer lacks...
How to Start Producing Synthwave: The Beginner’s Guide You Actually Need
Synthwave might sound like neon lights turned into music — nostalgic, dreamy, powerful, retro, and modern all at once. But if you’re just getting started, it can feel overwhelming: “What synth...