In this synthwave sound design tutorial, we’ll discover how to create a synthwave sound from scratch using Serum Xfer Wavetable Synth. A well-rounded producer can synthesize a sound in minutes giving him or her the ability to create compelling synthwave sounds while sounding unique. Although most producers shy away from using presets, many have spent years crafting their sound-sculpting skills hoping to create a soundscape that is uniquely theirs. In this synthwave tutorial, we will synthesize a synthwave sound in Serum Xfer Wavetable Synth that you can use for a variety of synthwave music.
How to Make Synthwave Sounds:
- Select the appropriate waveforms
- Thicken your sound be adding unison
- Increase your sounds polyphony
- Choose the Low-pass filter and adjust it’s cutoff
- Adjust the filter’s resonance
- Apply an envelope to the synth filter cutoff
- Adjust the envelopes ADSR
- Add audio effects to your sound
- Use an LFO to effect the panning of your sound
- Apply an additional LFO to detune your synthwave sound to taste
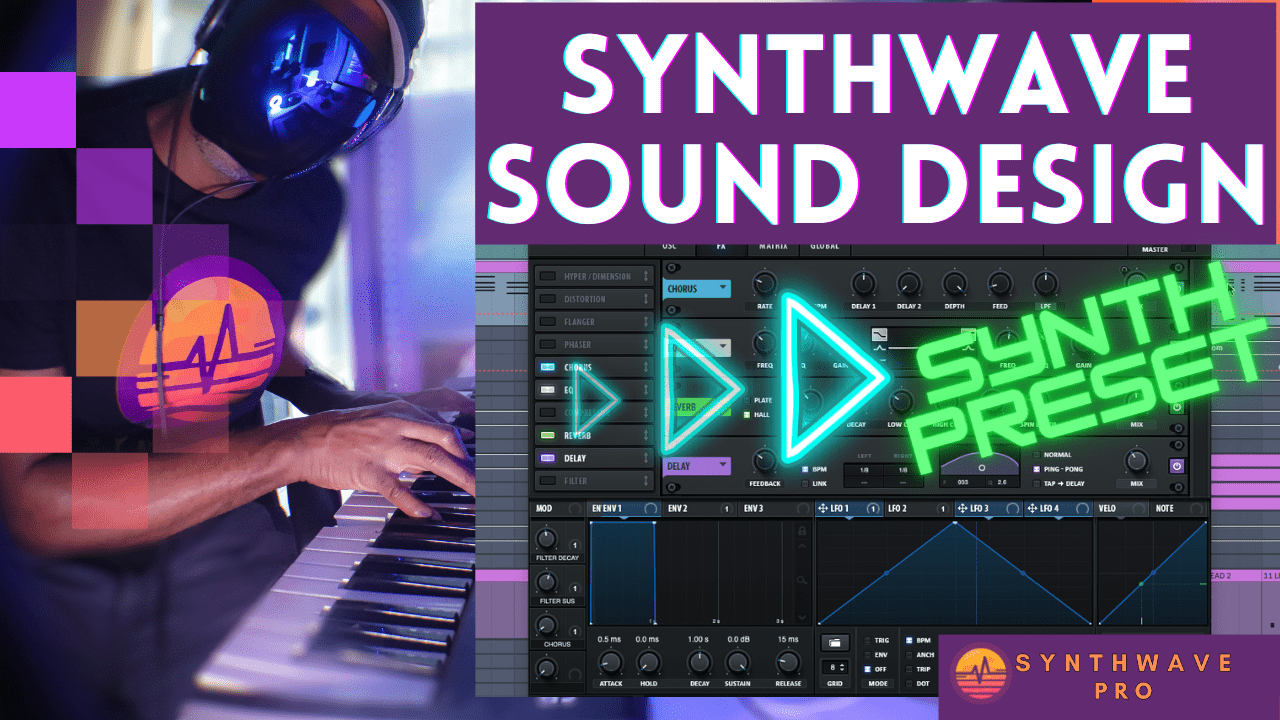
Choose Your Waveforms
Which waveforms are best for synthwave music? The answer to this question depends on what type of preset you want to create. For instance, most bass patches use a combination of sine and square waveforms. For example, the sine and square waveforms are ideal for bass presets as they are rich with low frequency information. As a result, bass patches that use these waveforms sound grounded and have a solid bottom end. In this sound design tutorial, we’ll make a polyphonic synth stab preset so we’ll use on a sawtooth waveform.
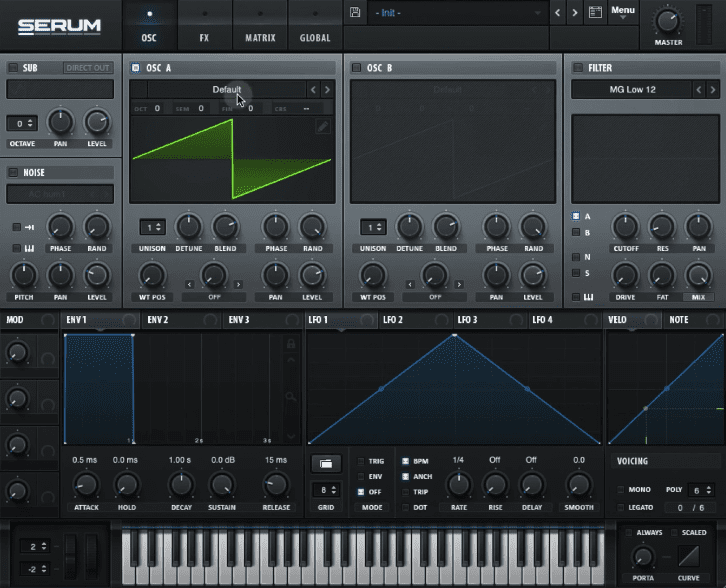
Add Unison For a Bigger Sound
Next, we’ll increase the unison of oscillator A to 2. Not only does this detune our sawtooth waveform, it helps add width and overall thickness to our sound. Don’t overdo this step as a little detuning goes a long way. In this tutorial we’ll set oscillator A’s unison control to a value of 0.03 which should be more than enough.
Understanding The Basics of Synthesizers
The most basic synthesizer consists of an oscillator, filter and an amp. Like most synthesizers on the market, they come equipped with a variety of additional modules such as noise generators, additional filters, envelopes and LFO (Low frequency oscillator)
Choose A Filter Type

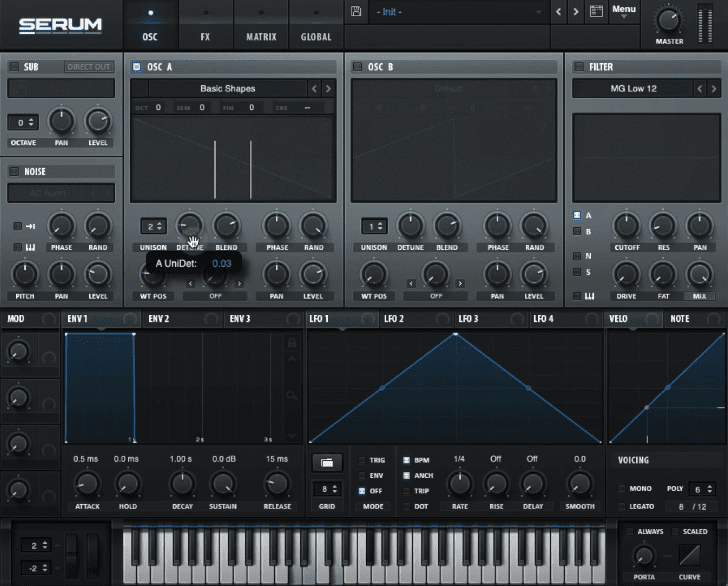
The next step is to route oscillator A to our filter by clicking on the filter modules A button . For this example, we will use a low pass filter with a slope of 12 dB per octave. This slope allows for additional high frequency material to pass through. Conversely, slopes with higher values (24, 48) offer a much darker sound so be sure to choose accordingly.
Understanding Serum’s Filter Modules
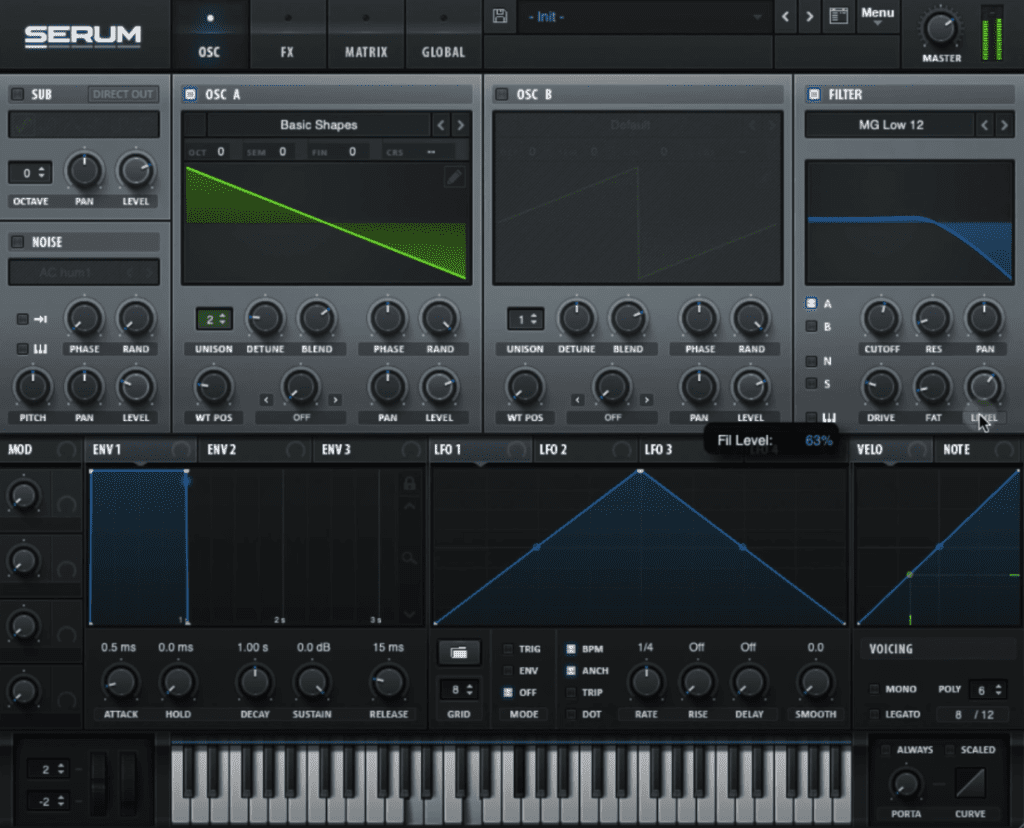
Next, we’ll add more thickness to our sound by increasing the drive and fatness knobs to our signal. Serum’s filter module boasts a drive and fat control so be sure to crank these up to taste. Be careful however, as this will saturate and boost the output volume of our signal potentially causing audio clipping as our sound exits the plugin. To avoid unwanted clipping, click and toggle the filter’s mix knob so it displays the wording labeled level – then reduce the output level of the outgoing signal.
How to Use Xfer Serum Envelopes ADSR
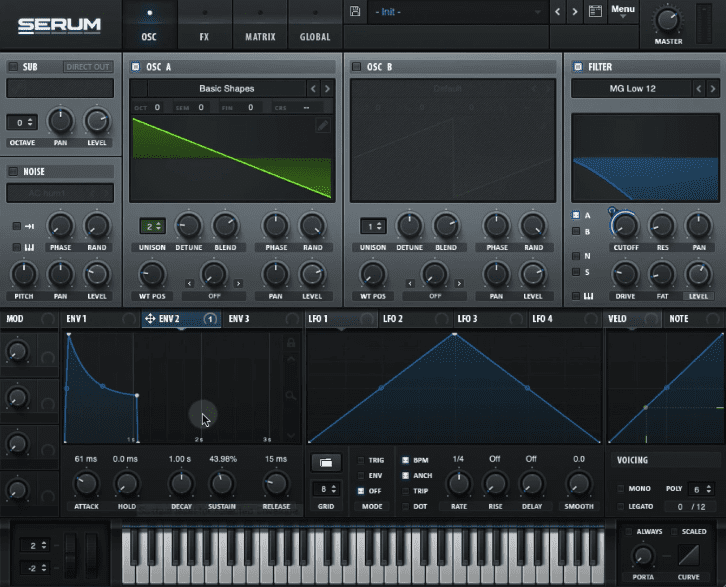
Envelopes play a critical role in sound design. For instance, they help shape our sound through time. By and large, envelopes are made up of components that allow us to manipulate how a sound responds when it is being played. Envelopes consist of stages known as ADSR, attack, decay, sustain and release.
- Attack
- Decay
- Sustain
- Release
Attack: The attack stage determines the time it takes for a sound to reach its loudest volume.
Decay: The decay stage determines the time it takes for the sound to move from the attack stage to the sustain stage.
Sustain: The sustain stage sets the level/volume of a sound when a note or key is being held or played.
Release: The release sets the time it takes for the sound to reach inaudible levels once a key has been released.
It’s important to understand that not all envelopes will be assigned to a synthesizers amp. For instance, an envelope can be applied to any synthesizer’s parameter. By default, Xfer Serum’s Env 1 control is set to the synth’s amp (volume). This means that the ENV 1, attack, decay, sustain and release will play a role in shaping the volume of our sound.
Since ENV 1 is linked to our volume control, we’ll turn to ENV 2 and apply it to our filter’s cutoff. Next we can set the the tracking so the filter is set to unidirectional – to do so, hold OPTION + SHIFT and click on the horseshoe button to toggle from unidirectional to bidirectional. Next, it’s time to adjust ENV 2, ADSR.
Now that ENV 2 is linked to the filter’s cutoff, increasing the ATTACK causes the filter to open gradually. The decay determines how long it takes to go from attack stage to sustain stage of our sound. Moreover, the sustain will determine the brightness of our sound. Finally, the release determines the length of time it takes for our sound to return to the initial attack phase right after we let go of a key.
As a side note, it’s important to know that the attack, decay and release operate in the time domain and are expressed in ms (milliseconds). Alternatively, the sustain control sets the level and determines the brightness of our filter while a key is being held.

Applying Xfer Serum Filter Resonance
One of the key components with synthwave sound design is a filter’s resonance. This is especially important when the filter type is set to a low pass filter. For instance, the resonance adds a bump to the filter cutoff point that is used to accentuate a particular frequency. This is often used in bass patch sound design to highlight the sound’s initial attack transient. In the context of our synth stab however, it will add a point to our stab to help define our overall sound.
How to Use Xfer Serum LFOs
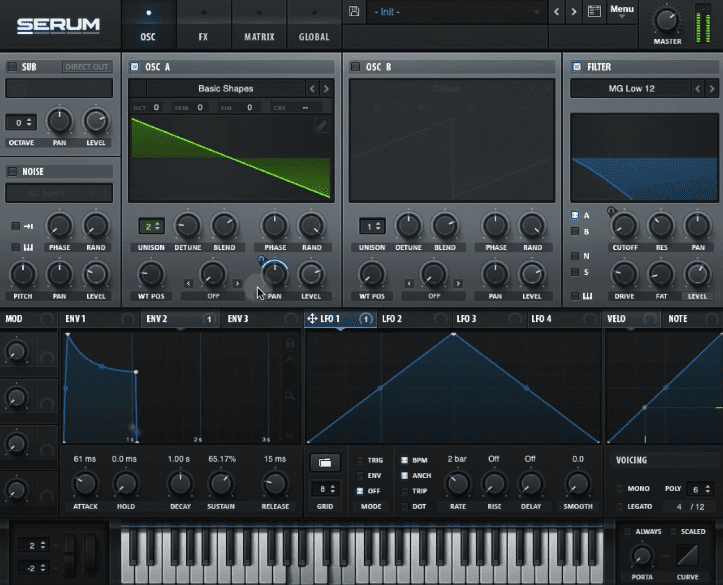
Unlike Serum’s main oscillators, LFOs (low frequency oscillators) are used to manipulate a synthesizer’s parameter. Unlike an envelope, LFOs are active at all times and are repetitive. In this synth stab tutorial, we will apply our LFO 1 to Oscillator A’s, pan pot. This will cause oscillator A to shift from left to right within the stereo field as set by the LFO’s rate. Again, be sure to set the pan pots tracking to bidirectional and set the LFO’s rate to 2 bars for a subtle panning movement.
How to Add White Noise To A Synthwave Sound
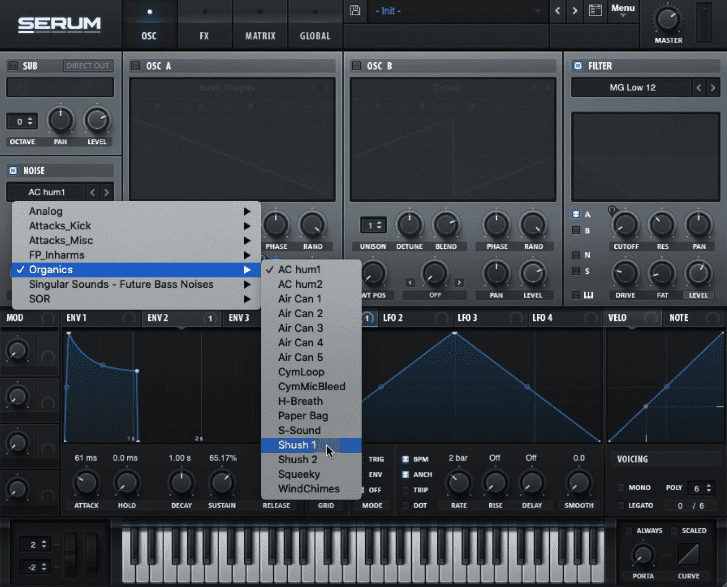
We can now consider adding white noise to our signal. Although most producers strive to reduce the amount of noise in their recordings, white noise can add grit and texture to any sound. In this next step, we’ll select the Shush 1 noise generator and route it to our filter. This white noise provides a clicking sound that is layered with our initial oscillator A sawtooth waveform. By and large, the human ear can detect the direction of incoming higher frequencies (white noise) thus our listener will be able to accurately pinpoint the location of our synth stabs in relation to our stereo field.
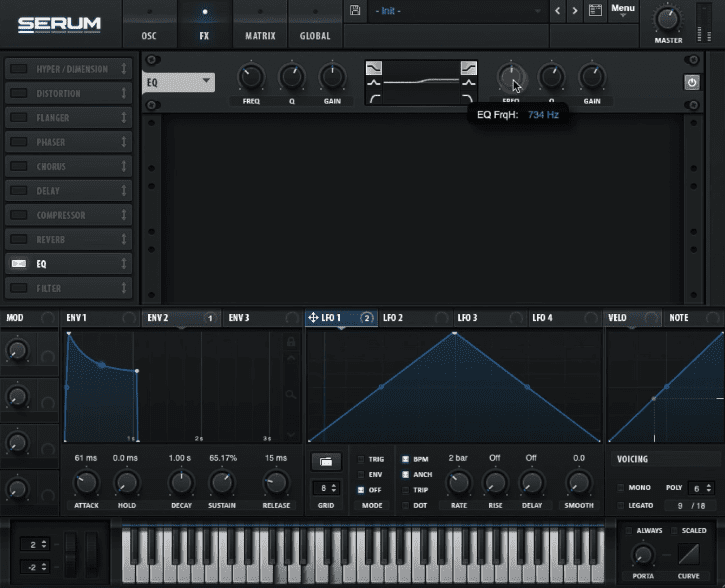
How to Add Audio Effects To Synthwave Sounds
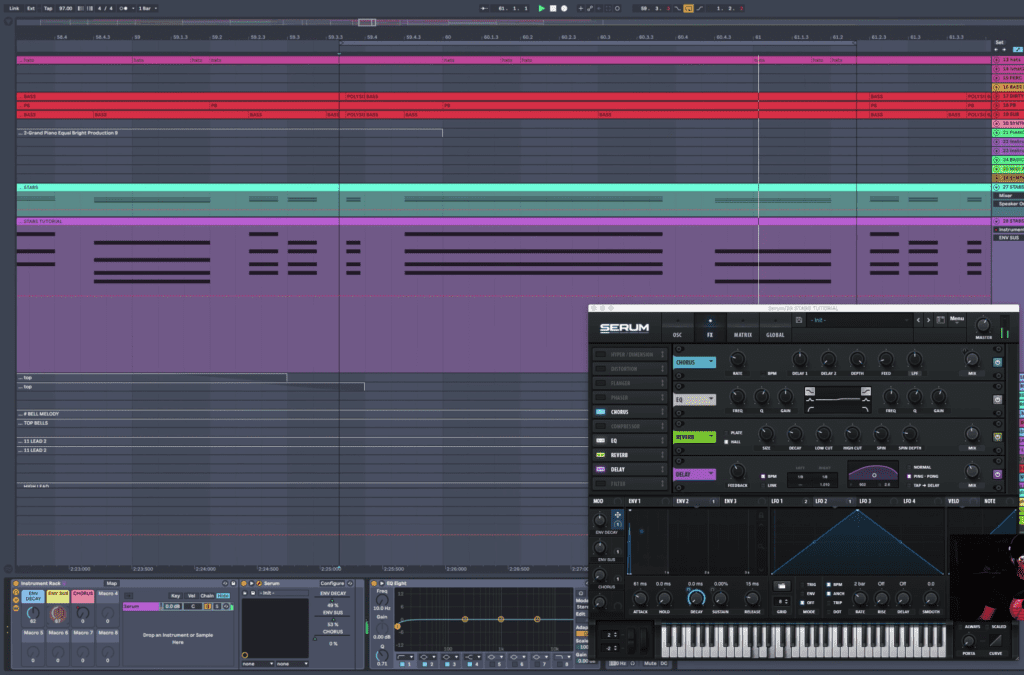
It’s time to add some audio effects to our sound. The first effect in our chain is a shelving EQ. Be sure to add 4 dB’s of gain as of 770 Hz. This will brighten our overall sound.
How to Add Reverb To Synthwave Sounds
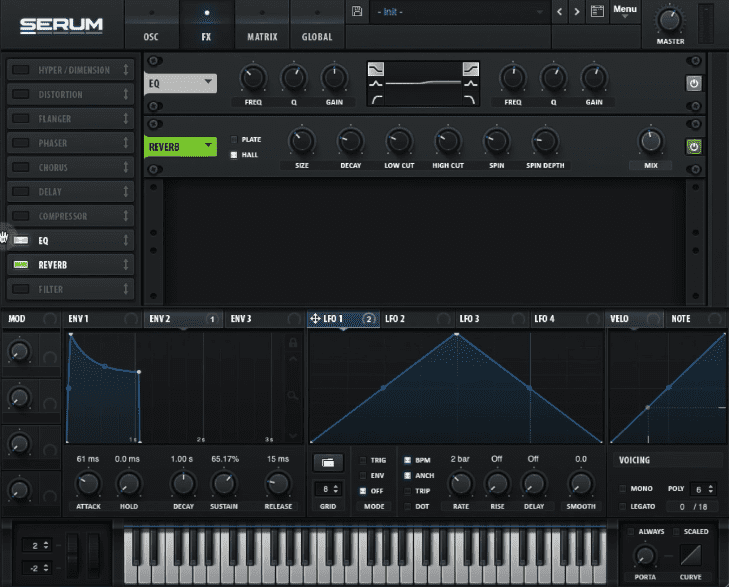
Add a reverb to the chain and place it after the EQ. Adjust the mix knob to taste and reduce the amount of higher frequencies in the reverb by reducing the high cut knob. Increase the reverbs mix knob so that it’s wet then adjust the reverb’s size, decay and dampness. Once these parameters have been set, reduce the mix knob to an appropriate level.
How to Add Delay To Synthwave Sounds
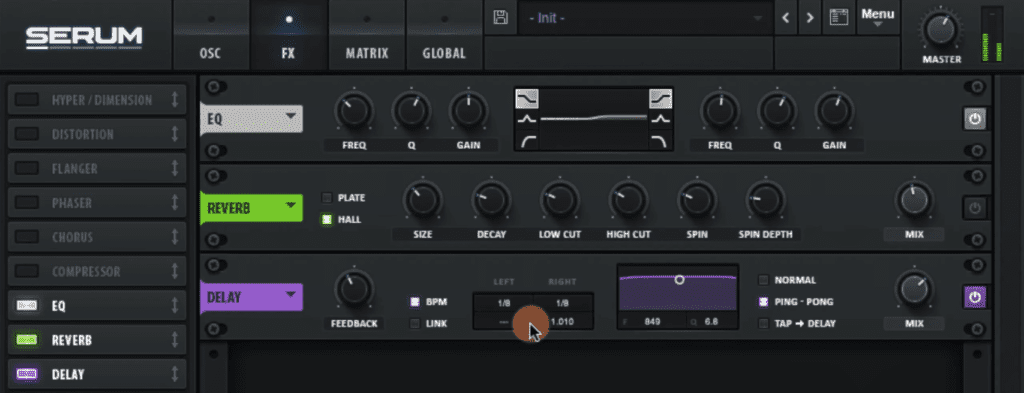
Next in our effects chain is the delay module. Be sure to add the delay after the EQ and reverb audio effects. Set the delay time to 1/8/ notes on left and right channel. Adjust the delay time by increasing the right channel delay’s time by few milliseconds. Set the delay module to ping pong delay and adjust the delay filters bandpass to reduce the extreme low and high frequencies.
How to Add Chorus To Synthwave Sounds
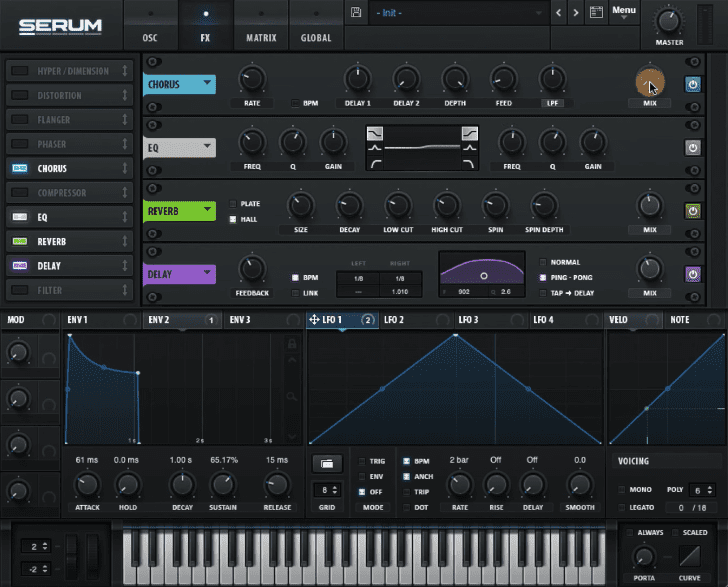
Finally we can add a chorus to the top of our audio effect chain and be sure to set the mix knob to 0. We will eventually assign this to Ableton Live’s macro control.
Detuning our Sound
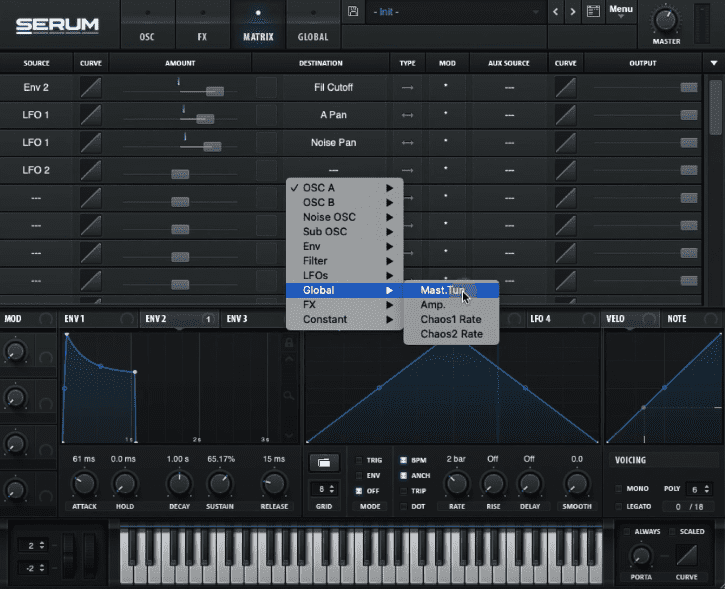
The next step is to detune our sound. For this, we will use LFO 2 to control the master tuning of our sound. To do this, we will turn to Serum’s matrix pane and select LFO 2 in the source column. From there be sure to link it to the Master Tuning parameter in the destination column. Finally be sure to set the type to bidirectional.
The key to effectively detuning a sound is to use a small amount. For instance, we can apply a small amount of detuning to the LFO 2 (value of 3) and adjust the output (dry/wet mix knob) to a value of 5.
Getting Fancy With Our Synth Stabs
Next we can use Live’s macro control to map ENV 2 decay and sustain. In addition we can use the Chorus’ dry/wet knon and link to to Live’s macro control. We can automate these controls throughout our arrangement to add contrast, interest and variety to our sequence.
How To Add Automation To Your Synthwave Track
Turn to Live’s arrangement and be sure to automate the chorus dry/wet control. Be sure to apply the chorus effect during sustained chords as this will add a dream-like quality to our sound.
Conclusion
Sound design can be an enriching experience and in time, anyone can learn how to program virtually any hardware or vst synthesizer. The secret to programming compelling synthwave presets is to learn the basics and understand how each component relates to one another.
How to Make Synthwave Melodies In Ableton – Tips and Tutorial
Recent Posts
Finding time to produce music while managing a job can be challenging, but several strategies can help you balance both effectively. Prioritize Music Production Make music a priority in your...
We often imagine making music as an effortless flow of creativity—strumming guitars in sunlit rooms or producing beats late into the night with pure passion. But for many musicians, there’s a...